Thursday 17 November 2011

Read all about it!

Good news baking fans! I have my very own website now! I won't reveal it yet as there's nowt on it- but when there is, you'll be able to read this blog, my enviro blog, my radio musings and hear my soon-to-be-born podcasts all in one place. Oh how lucky you are!

Got a very special recipe for you today that I stumbled on over the Internet. Excuse the pics- they were taken on a camera phone as, let's face it, I couldn't be arsed to find my camera. Take a peek at this beauty:


Oh my life! Check it. THAT my friends, is a PASTA PIE. 'What?!' I hear you cry! Yep, pasta in a pie shape. So unnecessary but SO much fun. The recipe was thought up by Noble Pig whose blog you should text for more good food ideas. So let's go!

Ingredients:

Bag of rigatoni
500g minced beef or similar
2 garlic cloves
1 can chopped toms
Lots of cheese of your choice


Method:


Pre-heat the oven to 200 deg cel. I used a tin with a removable base to make this, springform job. If you haven't got one then I would find some other kind of crazy pasta-based dinner to make. You need to make a bolognese sauce which I am sure you've done before but if not, fry up the meat with your onion and garlic. You need to add seasoning at this stage so the meat sucks it up. Essential are pepper, salt and mixed herbs but the rest is up to you. Sal likes to add chilli flakes. Maybe you like a bit of mixed-spice. Be free, my friends. When you've done that throw in the chopped toms and simmer it for a bit. Wicked.

Part-cook the pasta and then run some cold water over it. Next stand the rigatoni upright one at a time in the pan. This is a bit tricky but persevere. Make sure they are packed in fairly tightly. Next take the sauce (make sure it is not boiling hot!) and using a spoon and your fingers, spread the meat over the pasta and poke it down into the rigatoni holes. This is gooey and super fun. Bake it for 15 minutes.

Lastly, grab it out the over and cover it all with a riduclously unhealthy amount of cheese. A mix of cheddar and mozzarella is fun. Bake it for about another 15mins or until turning golden brown. Cut into it with joy:


CRAZY GOOD! And makes loads, btw, so make sure you have lots of guests or freezer space.

Loving it,

Ash x

Monday 12 September 2011

Heaven Is A Slice of White Bread...

While I was in America, I was forced to realise all over again a horrible fact: American bread is a disgrace. It is sweet, spongy and completely devoid of character. It makes neither a satisfying sandwich nor tasty toast. It is, in a word, minging. So upon my return to the UK I vowed to learn how to make my own bread and prove that the Yanks, in this respect, are being lazy. How hard could it be?

I've started off with a white bread recipe because a) white bread is ridiculously delicious when done right and b) apparently it's easier. This is my first loaf-making outing and so we are learning together. Here's the concoction I used:

Ingredients:

500g strong white bread flour
1 packet (around 2.5tsp) of yeast
300ml water
2 tsp salt
3 tbsp oil

Method:

Get a generous bowl and mix the flour, yeast and salt. Just a wooden spoon is a fine weapon, no need to get fancy. Next pour in the oil and about half the water. Stir and stir. Add more water slowly until the dough is combined enough to get your hands in and start beating in around. You may not need all the water so add it in small doses. Unlike pastry, it doesn't matter if your dough is a bit too wet but it does matter if it's dry. Keep kneading and beating it until it sticks neither to your hands nor the bowl.

Next line the bowl with a drizzle of oil, plop the dough back in and let it rise for an hour. Don't be tempted to shorten this time, no good will come of it. After the hour's gone it should be looking a lot bigger. Flour a surface then beat the dough on it some more. Knead the hell out of it and let it rise for another hour whilst the oven is happily heating itself up to 220 degrees celcius. After the dough is risen, pop it in a loaf tin and shove in the oven for 25-30mins. My oven only took 25 so be sure to check it. You'll know it's ready when you turn it out and flick the bottom to hear a hollow noise. If there's no resounding tap then it's not done.

When you've eaten half of this loaf it will look like this:

Fantastic. Fluffy and light with a chewy crust. If this plus butter and Marmite doesn't do it for you then there's nothing more I can do.


With love,

A x

Sunday 4 September 2011

Yum yum, damson plum

Hello again!

I have always wanted to be one of those incredible people (mostly women, of course) who are ready for Christmas by the time Halloween is over with. To that end, this weekend I have prepared my damson gin. For those of you who hate gin usually, do not be afraid, this is a fantastic sweet tipple that anyone with operational taste buds should enjoy.

First of all you need to locate some damsons. If you don't have your own tree, and none of your friends do either, they are available in fruit and veg shops at the moment. The season is not long so you should be looking for some now. Picking them is good fun. It took my friend Abi and I less than five minutes to pick enough damsons to make three bottles of gin.

Ingredients:

450g damsons
85g sugar
1 small bottle of gin, I think they are around 380ml, you know the ones I mean.

Method:

So simple. Prick a hole or two in each damson with a skewer or similar pointy tool. Pop them into a kilner jar or other airtight container. Pour in the gin and the sugar and shake up well. Then you need to leave it for around three months. Be sure to cover all the damsons with the gin or the top ones will go funny. Shake regularly. Taste the gin after around two months. If it is too tart, add more sugar. And that's it!

Here's how mine looks right now:

Lovely colour ay?

Happy brewing!

A x

Saturday 3 September 2011

Return of the Ash

Well hello!

Oh it's been such a long time since we were last together, surrounded by flour and sugar and chocolate chips! May was filled with moving, and June, July and August with holidays. Oh what a troubled life I lead. BUT I am back now, and I have gathered a lot of baking and cooking ideas in America (land of the free, home of the fat) and I cannot wait to share them.

One thing the Americans really do know how to bake is cookies. They are all over it. They have an entire aisle in their shops devoted to cookies of every flavour, shape and size. Their kitchen shops are packed with cookie cutters and so I stocked up on some unusual shapes. Yesterday, as a present for Sal who is a plane geek, I made some spitfire biscuits. It was my first time making biscuit dough that is stiff enough to roll out- my gooey cookies certainly would not survive in a mould. So let's see how they turned out:

Wow! Those babies are enough to scare Hitler.


The recipe is wonderfully easy and yields a lot of dough so do give this a try.

Ingredients:

175g butter
200g caster sugar
400g plain flour
1 tsp vanilla essence
1 tsp baking powder
1 tsp salt
2 eggs

Method:

Preheat the oven up to 185 degrees celcius. With shaped biscuits, you don't want the oven too hot or they will swell and lose their shape.  Next cream up the butter and sugar. It sometimes help to dice the butter if it's a little hard and then rub it in to the sugar with your fingers at first. Then get a spoon out and bash it around until it is fluffy.

Next you want to beat in the eggs and vanilla. You can do this by hand or with a mixer if you have one. Don't worry that you've made scambled eggs by accident, it's all good. Combine the dry ingredients then throw them in the bowl with the gooey eggs sugar stuff and mix gently. When it's ready, it should not be sticking much to your hands or the spoon. If it is, add more flour until it's smooth.

Grab some cling film and flour it, then divide the dough into two and wrap the balls in the cling film. Stick one in the freezer- that's your dough for the next time you want biscuits. Trust me, having ready-made dough is a wonderful thing. Put the other one in the fridge and go do something else for an hour. When time's up, flour a surface and roll out the dough from the fridge to no thinner than about 1.5cm. The thicker it is, the bigger the biscuit but they may lose their shape if too large.  Select your favourite cookie cutter and get busy! Make sure you gather up all the offcuts and roll them out again to make the most of your dough. Feel free to eat any that is leftover (particularly good stirred into ice cream...)

Bake for about ten minutes, or until they are starting to go golden brown around the edges. Cool on a wire rack then make plane noises as you fly one into your mouth.

Ideal!

A x

Thursday 14 April 2011

Waste Naught, Want Naught

Well, firstly, sorry it's been a couple of weeks since we last met to discuss the wonderful world of baking. I haven't been able to do much of it recently. The downside of baking is you run the risk of turning into Michelle McManus in an alarmingly short period  of time. Baking feels so comforting and tastes so wonderful precisely because it's so bad for you! But only in large quantities right? Everything in moderation. So let's get on with it.

Due to my thoughts on food waste, I am very interested in the role baking can take in helping to cut down on food waste. A past-its-best piece of fruit or veg is incredibly difficult to sell as a tasty treat, but just try keeping cake or cookies or tart around the house for more than a couple of days. Baking is the original and best (not to mention the most delicious) way to use up things in the fridge.

So what have I been using up? Well, Ed and I get a fruit box delivered each week. Sometimes we get a large quantity of oranges and we never get through them fast as we're both too lazy to peel anything! So I had a few big oranges going soft and taking on a life of their own in the fruit bowl. They're perfect to make an orange cake. I adapted this recipe from one for a lemon cake, so if it's lemons you've got lying around then feel free to substitute. This cake is extremely light and moist, juicy and creamy. It's a perfect sunny afternoon cake, or perhaps at a party with a glass of champagne.

Ingredients (cake):

225g butter, diced
225g granulated sugar
225g self-raising flour
2 tsp baking powder
4 eggs
50ml double cream
Grated zest and juice of 1-2 oranges (your choice)

Ingredients (filling):

Grated zest and juice of an orange
2 eggs
60g butter
90g sugar
200g mascarpone

Ingredients (topping):

Juice of one orange
50g sugar

Method:

First off we need to make an orange curd for the filling. Put all the filling ingredients in a heatproof bowl and set it over a saucepan of simmering water on the hob (just fill a saucepan half full, let the water gently make bubbles but not boil and place the bowl with ingredients in the pan). Whisk it up until the butter is melted then just keep ooooooooooon whisking for a few minutes until it looks a bit like thick custard. Gloop it through a seive into a bowl, cover in clingfilm and shove it in the fridge for a couple of hours.

Now we do the usual, preheat the oven to 170deg, 190 if you don't have a fan oven and gas mark 5 if you're retro. Butter up a cake tin, somewhere around 20cm if you have it. Removable based tins are really useful, but I used silicon and it worked just fine. Butter it generously if you have neither. Pop all the ingredients into a big bowl and cream together. Way easier with a processor but I don't have one so you'll be fine. Once it's all smooth and yummy looking, spoon it into the tin and bake it for between 45-55 mins. Keep testing it, make sure it's cooked (skewer will come out clean) but not tough or burned at all. When it's out, and still hot, combine the topping ingredients and spoon it over the cake. Leave it now, if you can! The juice will sink in to the sponge.

Blend up 100g of the orange curd with the mascarpone. You probs won't need it all, more like half, but apparently it's awesome on toast :) Cut the cake in two with a bread knife, gently cutting round. Spread the filling generously and reassemble the cake. If you're not going to eat it right away, cover and chill it but bring back to room temp before serving.

And that's it! It really is amazingly tasty and light. Give it a go.

A x

Tuesday 5 April 2011

Appley Ever After

Last week our fruit basket was looking a bit sorry for itself, overflowing with oranges (with neither me nor Ed nor Sal can ever be bothered to peel and actually eat) and several apples that had had that slightly spongy feel to them since the day they arrived. Baking is one of if not the best solution for using up over-ripe fruit because it really doesn't matter what state you've let the poor apple or pear get to, it'll still be fantastic once it's stowed safely in cake batter.

So the sad looking apples made their way into a Dorset apple cake. I resent this name being used to widely as, being from Dorset, I can see nothing particularly Dorset-like in the making of it, especially as all the recipes for it seem to be different. This one is fairly dense but not heavy and will suit those who are not into sickly cakes. It has a delicious spicy kick to it, courtesy of cinammon, and even non-fruit lovers should enjoy it. There are no special ingredients and it takes only a few minutes to create so get to it.

Ingredients:

225g of apples of your choice (or those that look the worst from your bowl!)
225g self-raising flour
1tsp baking powder
1tsp of cinammon or 1/2 tsp of mixed spice (depending on preference)
125g diced butter
125g caster sugar
2 eggs, beaten

Pre-heat that oven you know so well to 190 deg celcius and butter up a round tin. Doesn't matter too much what kind, just make sure you'll be able to leaver the cake out OK.

Core and dice the apples. Most recipes tell you to peel them but I see no need to remove this tasty and nutrional part of the fruit so I wouldn't bother. Sift the flour, baking powder and mixed spice into a bowl together and chuck the butter in. Rub the butter in with your fingers until you have a nice crumbly mixture. Bung the sugar and apple in there too, then slowly stir the eggs in.

Spoon the mixture into your tin. Next you wanna thinly slice a bit of extra apple and arrange the slices in a pretty pattern on top. Pop it into the oven for between 30-40 minutes. It'll be springy to poke when it's ready and if you stick a knife it it'll come out clean.

And that's it! So simples. When it's out the oven, sprinkly a tbsp of caster sugar onto the hot cake and leave it to cool. Then have a big slice with a cup of tea. Or, as I did, a massive glass of wine.

Winning.

A x

Wednesday 30 March 2011

Ways To Feel Happy

Last week I baked cookies. I've become a bit of a regular on the cookie baking scene because I think they are a very special part of baking. For a start, they are one of those foods that you would be hard pushed to find someone in opposition to. Let's face it, everyone loves a cookie. They symbolise all that's good and comforting about life, it's hard to feel unhappy whilst eating one. They're great at any time of day and for any reason.

Top of everyone's list for cookie types seems to be two things: chocolate and chewy. Cookies are best when they're packed with oozing chocolate, still warm through slightly, and served with ice cold milk. So I went in search of a gooey recipe and found one courtesy of the BBC. It wasn't chocolately enough though, so this final draft has been tweaked slightly to better satisfy the chocoholic in all of us. Have a go at making them and, in turn, making someone's day.

There they are, perfect in their imperfection.

Ingredients:

225g margerine or butter (I always prefer butter, but it is harder to work with)
170g soft brown sugar (works fine with caster but is best with brown)
340g plain flour
200g chocolate (I like to do one dark and one milk but it's up to you)
4 tbsp golden syrup
4 tbsp milk

Method:

Preheat that oven of yours to 150 deg celcius or 170 for non-fans (that's non-fan ovens, not people who aren't fans of ovens).

Cream together the butter and sugar until light and fluffy. You can do this by hand or machine, whatever your preference. Add the golden syrup, milk and smashed up chocolate, then mix. This will look like really gross scrambled eggs but have no fear, it's as is should be. Add the flour slowly, mixing gently as you go until you have a smooth cookie batter. If it's looking a bit runny, add a drop more flour, if it's too dry then add a little milk. It should be medium consistency.

Cover a baking tray with greaseproof paper, or if you have none then butter it generously, and spoon the batter on in blobs. The cookies will grow to be about twice the size of your blobs so be careful. If you make them too large, the bottom will burn before the middle cooks and this is not a pleasurable eating experience. Pop in the oven for about 10 minutes, until the cookies are turning golden brown. Do not over cook or you'll lose that gooey experience.

Eat these slightly warm, or pop in microwave if they are completely cooled. This is such a base pleasure, it's wonderful. Set 5 minutes aside to have a glass of milk or dunk them in a cup of tea and try to forget your troubles.

It turns out cookies are as good as prozac ;)

Savour it.

A x

PS - If you enjoy this blog, please do subscribe by using the sign-up on the right. It's easy and will notify you when I post.

Friday 25 March 2011

Worship Me, For I Am Mighty

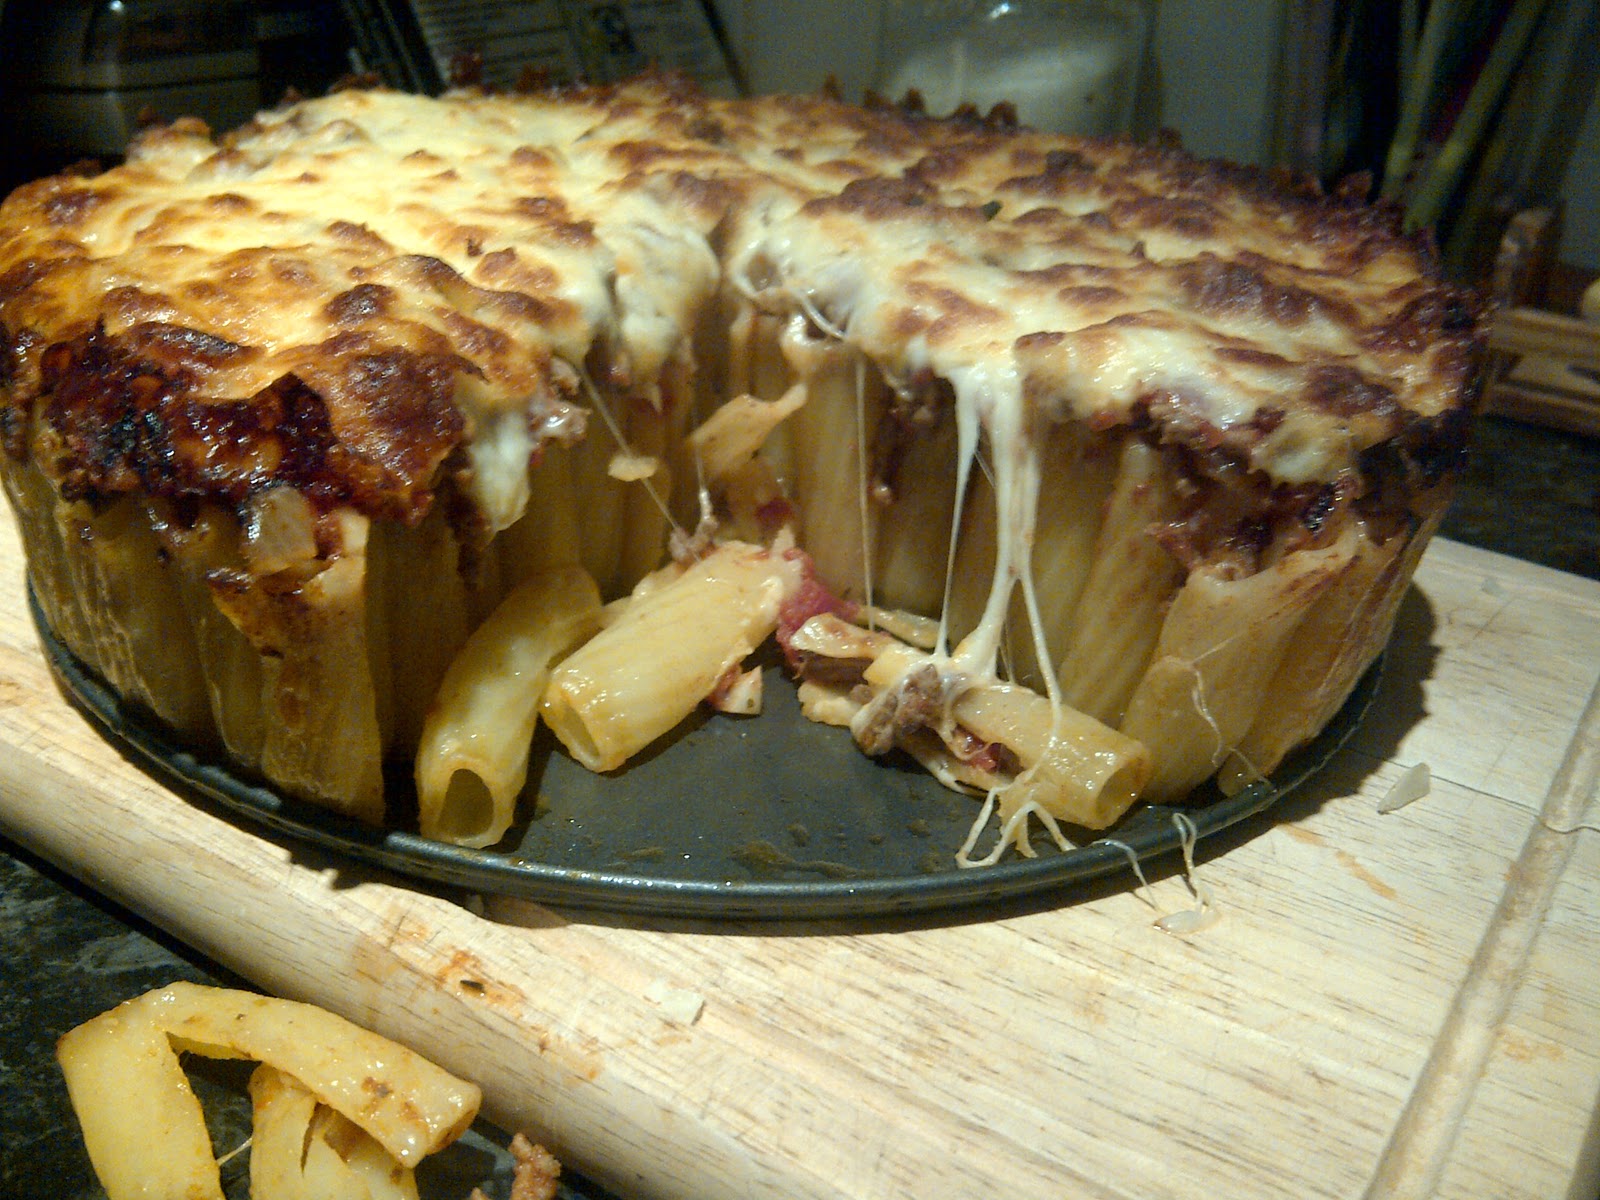
Right. So I made the best chocolate cake in the world. Ever. Probably. Sal said it was the best she'd ever had and she is a doctor so we must respect her rulings. I'll include some pics of it as I was cooking it, so you can see what it should look like. It's from a Good Food recipe. In order for this cake to work, follow the recipe and the ingredient measures exactly. Fo' serious.

I mean, come on, look at that! That's a thing of beauty, if I do say so myself.

Ingredients (cake):

200g quality dark choc (70% cocoa solids)
200g butter (not marge) diced
1 tbsp instant coffee granules
85g self-raising flour
85g plain flour
1/4 tsp of bicarbonate of soda
200g dark muscavado sugar (light will do, but dark makes a richer cake)
200g caster sugar
25g cocoa powder
3 eggs
75ml butter milk

Ingredients (topping):

Bar of white chocolate
200g quality dark choc
284ml double cream
2 tblsp caster sugar

Firstly: If you don't have any butter milk then a cup full of milk with the juice of a whole lemon mixed in, then left for 5 minutes, will do the same job.

As usual, pre-heat the oven to 140 deg or 160 if no fan. Line a cake tin, around 20cm if you have it, or if possible use one with a removable base. If you don't have lining then butter it extremely thoroughly.

Smash up the chocolate and melt it in a pan with the butter. Dissolve the coffee granules in 125ml cold water and pour that in with the melting choc and butter. Melt, warm and mix. Yeehah. Do not over heat this, you don't want anything sticking to the pan at all. While that's doing its thing, mix the flours, sugars, bicarb and cocoa in a bowl (sift if you can). Get your hands in the bowl to do this as you'll need to rub the lumps that muscavado makes out. No lumps at all if you can manage it. Next beat the eggs and put them in the flour mix bowl with the buttermilk. Stir stir stir.

Pour the chocolate buttery yummyness into the floury sugaryness and mix until you have a smoothe cake batter. Oh Lord. I can almost taste it typing this. Pour evenly into your cake tin and stick it in the oven. Mine took exactly 1 hour 23 minutes to be ready. After about 1 hr 10 a skewer came out clean but the top felt a bit jelly like so make sure that it is fairly firm to the touch on top. Do NOT leave in any longer than strictly necessary, it shouldn't need more than 1 hour 30 minutes, or you won't get the fudgy effect.

Whilst the cake is doing its thang, make the ganache topping (if you've read my other posts you'll be able to do this with your eyes closed by now!). Smash the dark chocolate up and put it in a bowl. Warm the cream over a low heat, stirring in the caster sugar too. Heat until almost boiled then pour into the bowl and stir until completely melted. It will look weird and milky at first but will soon thicken up. Put in the fridge to thicken but be sure to keep a soft spreadable texture (if you over cool it, just microwave for a few seconds).

Get the cake out, turn it onto a cooling rack and be sure to wait until it's completely cool, however hard this task is! It should look a bit like this:


If it doesn't, don't worry! I'm sure it'll be delcious. When it's cool, get a bread knife and cut the cake into three, horizontally, so you have three thin layers. Don't try and carve straight through the middle, stick the knife in the gently cut round, turning the cake as you go. When it's in three, get your ganache out and spread a fairly thin layer onto the bottom and middle layers of the cake so that you have two layers of filling. If you catch my drift...

Once you've assembled it back into one cake with your dual-filling, smother the entire thing, including the outside edges, in ganache. Get it all over so no cake is visible. This is super fun! You can do patterns if you want or use a pallette knife to make little waves. Next get your white choc and melt it for a very few seconds in the oven or microwave so that it is just starting to become soft at the edges. Get a peeler and, applying pressure downwards, peel along it like you would a carrot. If you have a cheese slicer, use that instead. This is actually pretty tricky so try to stick with it. It will make the white choc curls you can see on the first pic. I arranged these in a flour type thing but you can do what you like with it really! Finish by grating the rest of the white chocolate over the whole cake.


If this isn't the best chocolate cake you've ever tasted, I want to know why. It's relatively simple but makes a truly impressive cake, perfect for a present or party. Let me know if you try this one.

Enjoy, children.

A x

Tuesday 22 March 2011

Gooey Gooey

Did quite a lot of baking last week but not much writing about it...

IMPORTANT INFORMATION FOR BANANA BREAD MAKERS: I made one for Sal's mum on Friday and added a large teaspoon of lovely cinnamon. This was clearly the missing ingredient as it was delicious. Also I added an extra banana and found it more moist than before. Go figure.

ALSO: I made some lemon versions of the blood orange slices I made before. Although these were a lot tidier looking, they did not taste as good because it turns out that my slightly burned shortcake was the key to the slices' success. Still they were proper yummy. Here's photographic evidence:


But the real story of this blog is the brownies I made. I'd read a couple of recipes using marshmallow in brownies and, because I had a bag of mini ones in my hot choc corner of the cupboard, I thought I might as well go for it. Seemed wrong to do just two layers though so I ended up popping a ganache on top. They're pretty much to die for. The brownies are so moist that everyone will want to be your friend. Here's the recipe, scroll down for a pic:

Ingredients (brownies):

200g of 70% coco dark chocolate (don't skimp, you'll regret it)
500g caster sugar
375g butter
225g plain flour
Pinch of salt
Dash of vanilla essence

Ingredients (toppings):

Bag of mini marshmallows
200g dark choc
274ml whipping cream

We'll starts, as is our custom, by pre-heating the oven to 180 deg celcius. You gas mark folks can figure the rest out on your own. Line a square tin with some greaseproof paper if you have it. Or maybe just butter it a lot like I did... up to you if you want to risk this. I did and wished I hadn't.

Melt the butter and chocolate together over a low heat, stirring it quite a bit as you go. While that's gooing away, mix the sugar, salt, vanilla and eggs together in a bowl. Add the melted choc and butter. This will look WELL NICE but try not to lick the bowl yet. Next add the flour. Mixy mix. Spoon the mixture into the tray and put in oven for about 20mins. If you like it gooey, don't leave it in any longer.

Whilst that is in the oven, make the ganache topping by heating the cream until almost boiled then pouring it over smashed up chocolate in a bowl and giving it a mix. Shove it in the fridge if you want to thicken it up.

When the brownies are out of the oven, sprinkle the whole mag of mallows evenly over it and put the tray back in the oven until the mallows are all melted together and seriously gooey. Don't worry if they brown slightly, the ganache softens them back up. When ganache has reached your preferred consistency, spread it over. Cut into squares and forget your diet:


Look at those, wacky. Duzza tried to eat one in the car... I'd be careful with that. DO NOT BROWNIE AND DRIVE.

Word!

A x

Thursday 17 March 2011

Pancake Fever

Well,
Over a week has passed since pancake day and I'm sure some of you are still in mourning. But fear not my friends! I am dropping in with a fruit-included recipe that will revive your from your pancake-induced drepression. Delia gave me some hints and tips for the pancakes so you know they're going to be good. They're covered in chocolate, cream and served with cinnamon roasted pears. Simples.

Let's go!

Ingredients (pancakes):

110g/4oz plain flour
Pinch of salt
2 eggs
200ml milk mixed with 75ml of water
50g butter

Ingredients (choco sauce):

100g chocolate (I recommend dark, but I won't judge if you use milk)
150ml cream

Ingredients (pears):

As many pears as you want to eat, cored and quartered
Big teaspoon of ground cinnamon
Big spoon of salt
Spray oil

Ingredients (cream):
Whipping cream
Icing sugar

Method:

Gently boil the cream for the choco sauce then remove from the heat and pop the crushed chocolate in there. Mix it up until it's all gone then put in the fridge to thicken it up a bit. Unless you like it proper runny? Whatever.

Now for the pears. Once they're cut and quartered, stick them on a a baking tray and spinkle the cinnammon and sugar on, as much as you desire or you feel is appropriate for the amount of pears you're making (three chunks of pear per pancake seems fair, I did two orginally and felt short changed). Spray with a few spritzes od spray oil. If you don't have it then toss the pears in an VERY small amount of flavourless oil (not olive then people). Pop these in the oven at like 180degrees for about 15-20mins but keep a close eye on them.

While the pears are a-roastin', make the cream up. Use as much whipping cream as you want. I fed 6 people with about 200ml I think but more cream would have been better. Obviously. So this requires some elbow creased. Pour it in a bowl and start whipping it up with a whisk. Pour in some icing sugar as you go, tasting as you whip because you don't want it getting tooooo sweet. When it's whippy and yummy, set it aside.

Time for batter! Mix the flour and salt together in a bowl. Make a well in the middle and crack the eggs in, then whisk it all together until the flour is all gooey. This looks really unappetising and stodgy but don't worry. Whilst whisking, slowly add the milk and water until you have a smooth batter. Don't stress about lumps, just keep whisking until they are gone. Next heat the butter gently until melted and pour 3/4 in to the batter and mix in. Pour the rest into a frying pan. Heat the pan until realllllly hot then pour in a good dollop of batter. Don't forget to have a good flip!

Once the pancakes are ready (put a plate over a pan of boiling water and put the pancakes on this to keep them warm and moist while you are cooking the rest) put on a plate, stick a few pears on, drizzle with choco sauce and splodge (or, if anal like me, pipe) some cream on! HELLS YEAH!

Here's a pic, with no cream sadly as this one is mine and I'd run out giving it to everyone else. Because I am such a good Samaritan. Or something:

Happy pancake + 1 week and 2 days day.
A x

Friday 11 March 2011

Pray For My Arteries

Hello!

OK loved ones. I have something super special for you today. Started baking these this afternoon and only now at 11pm am I actually eating one (it has been a busy working day). To break with convention, I am going to put the picture first as I think in this case a picture is worth a thousand words:

Oh yes! Look at that shit! Wowzers.


Also breaking with convention, there is no fruit or veg in this. It's hardcore chocolate. Ready for the recipe? Let's do it.

Ingredients (cakes):

150g plain flour
50g cocoa powder
1tsp baking powder
1/4 tsp salt
170g butter or marg
335g caster sugar
3 eggs
2tsps vanilla extract

Ingredients (hot fudge sauce - lush):

110g caster sugar
35g cocoa
80ml whipping cream
2 tblspn butter or marg
1tsp vanilla extract

Ingredients (filling):

ICE CREAM! Vanilla is best.

Once you have assembled your tools, preheat oven to 170 deg celcius. Get a bowl and whisk up the flour, cocoa, baking powder and salt. Easy. Melt butter gently over a low-ish heat then take it off and stir in sugar, then eggs and vanilla. This will look really weird and gloopy but don't panic manic. Stir in the flour mix until blended so there are as few lumps as you can manage. Then spoon the mixture into large cupcake cases. You can fill them up about 3/4 of the way because they don't rise too much. Put in oven for about 30mins, but check regularly. When they're ready, as usual, a knife stuck in should come out clean.

While they are in the oven, do the fudge sauce. Pour the cream into a saucepan with the sugar, cocoa and butter and boil it up gently, stirring lots and lots. Take it off the burner and drop the vanilla in. Try not to stick you face in the pan, not long now 'til you can eat.

When the cakes are done, and cooled a bit, saw the lids off and scoop out the inside. Set these aside in a tub for a snacking moment or to pour on ice cream once you've recovered from your sugar coma. Fill the cake with vanilla ice cream, pour some fudge sauce over, and put the top back on. This does not have to be tidy. You will discover that the more sauce the better. It takes like Jesus' own sauce.

I recommend going for a run the day after eating.
Bon appetit!
A x

Thursday 10 March 2011

Magical Baking

OH YES.

Did some proper yummy baking today. I was very unsure of what was going to happen, and even what it was I was cooking really as the recipe I followed was entitled 'Blood Orange Petit Four'. Easy peasy I thought. What I've ended up making, basically, is a kind of shortbread with a light egg/sugar/blood orange spongy bit on top. And icing. I promise you these are bloody delicious. Here's how (sort of) to do it:

Ingredients (shortbread):

225g plain flour
100g icing sugar
180g butter

Ingredients (topping):

Juice of 3 blood oranges
300g sugar
3 eggs
3 tblsp plain flour

Method:

Pre-heat oven to 180 degrees or there abouts. Mix together the shortbread ingredients. Try as I might with a spoon, I could not combine them and found the only way was to get my hands in. This was curiously satisfying, rub the butter lumps between your fingers until you have a bowl of sweet sand. Pour this into a well-greased tray of your choice, I used a square 9-incher, seemed about right for thickness. Press down until the mixture is pressed evenly. Shove in the oven for around 20 minutes or until golden brown. RESIST URGE TO EAT NOW. Turn is out to cool it down. While it's doing that:

Whisk the eggs, blood orange juice sugar and flour together until frothy (it will still be fairly liquidy). If I was baking this again I would have put a dash of lemon in as I felt they lacked tartness. So if you're feeling tarty splash a bit in. I put some drops of red food colouring in the pink it up. Place the shortbread back in the tray (it doesn't have to be cool through) and pour over the eggy mixture. Stick it back in the oven for another 20-25 minutes. Don't panic if it puffs up in weird places, it will deflate.

Get it out and look at it, wondering what on Earth it is. I cut mine up in the tray as it's un-turn-out-able, as it were. Make some different shapes if you have the inclination. I made squares and triangles but cookie cutters could definitely be employed. Make them small, it's very sweet. Now for the magic. I have no idea if this was supposed to happen (and even know I am questioning my memory) but as I was getting the slices out I was thinking "hmm, where is the eggy stuff?" until I got out my first slice only to realise, with baking shock, that it was now underneath the shortbread?! It had been on top after 12mins in the oven... but there it was, a perfect pink layer beneath a crunchy one. Bizarre. I puzzled over this whilst shovelling bits in my mouth.

Things get really sweet and yummy if you mix some icing sugar with warm water, add a little red dye, and spoon it on top of the slices. Delicious. I was genuinely surprised at how yummy these bites are.


Good luck!

A x

Tuesday 8 March 2011

Sisters Doing It For Themselves

Hello all,
Sorry I missed posting yesterday. I had a very busy day going swimming in the sun, drinking coffee and doing training for some work I am doing ("work? You?!" yes really).

Today as you may or may not know is International Woman's Day, celebrating 100 years of increasing freedoms for the fairer sex. Makes me proud to be a lady (like David Walliams). The fight is pretty far along here in the UK, but there are a lot of countries where equality is only just beginning to be a word people understand. For more information and to see some of the things women are dealing with all over the globe, check out Actionaid's special site: http://www.actionaid.org.uk/102779/get_lippy.html

Today is also pancake day of course! If you want to see a great eco-friendly pancake recipe then head over to my eco blog, www.tescotermination.blogspot.com for some ideas. I have done other baking this week, naturally. On Sunday night I made pizza bases for the first time, whoop! Surprisingly easy and absolutely delicious:

Ingredients:

650g strong white bread flour
7g packet of yeast
50ml warm milk
350ml warm water
2tsps salt
2tbl sp olive oil

Method:

Stir the flour, yeast and salt up together then add the milk and oil and mix thoroughly. Next pour the water in, a little bit at a time, and get your hands in the bowl to mix it. Comes out a LOT better if you mix by hand. Keep adding the water and bashing the mix around until you have a dough bouncy substance. If it's a bit gooey and wet, add a touch more flour, if it's flakey and dry, add a touch more water. Simples.

Flour a surface and your hands then knead the dough (beat it about, stick your knuckles in it, fold it around). Make a big ball and stick it in a large bowl with a damp tea towel over it for an hour. Flour and knead it again then back to the bowl for an hour. Seperate into 6 small balls or 4 larger ones then roll out to desired thickness. You can decorate them with whatever toppings and stick them straight in the oven at around 200 degrees, no need to pre-bake.

Enjoy!
A x

Friday 4 March 2011

Bake Your Way To Five A Day

Hello one and... one of you,
Today's delicious treat comes courtesy of the wonderful Green Valley Grocer's in Slaithewaite where I bought some beetroot last week. I am actually quite tipsy on wine as we speak and so I am going to keep banter to a minimum and just give you this goddamn tasty recipe.

Rather than making a salad with the betroot I made... a cake. Obviously. Chocolate and beetroot with a cream cheese filling and chocolate ganache topping. I edited the recipe as I went along, obviously, and I feel that complete success in this baking endeavour probably requires an electric whisk but man, I made a tasty feast without one so so can you. The betroot is central to this recipe because it keeps the cake moist and will make it last a lot longer than your average sponge.

Ingredients (cake):
250g beetroot (you need to boil these, stem on or the colour leaks, for about an hour til soft, then peel them and whizz them up til you get a puree style thing. I left some lumps in mine, I advise against this!)
230g self raising flour
200g caster sugar
100g cocoa powder
100g proper dark choc (70% coco solids, spend a couple quid)
3 eggs
125g unsalted butter

Ingredients (filling):
200g cream cheese
200g icing sugar
60g unsalted butter

Ingredients (topping):
200g dark choc
250ml whipping cream

OK so, easy, set oven to 180 degrees. Mix up the flour, sugar and cocoa and set to one side. Blitz up your beetroot and add in 3 whisked eggs. Mix. Melt the choc and butter together in a bowl over some boiling water. Mix all three together, as in eggs beets, buttery choc and cocoa flour. Try and get this smooth (good luck with that).Pour into two round tins if you have them and pop in oven for about 40mins or until a knife comes out of centre clean. If you only have one tin then cook it a bit longer, 50mins, and cut the cake in half once cooled.

While it's cooling, make the ganache topping by putting cream in pan and heat it up until it's almost bubbling but not quite. Take it off the heat and throw in the smashed up chocolate. Mix until it looks like something you want to stick your whole head in, then shove it in the fridge for about an hour until it gets nice and thick.

Meanwhile make the filling by whipping up the cream cheese with the softened butter and sugar. If you have an electric whisk this will make a lovely fluffy filling. If like me you only have your arms, then it will be runny but still delicious. When the cake is cool, spread the filling on half of it and shove the other half on top. WARNING: do not spread topping right to the edge of the cake or you will make an icing waterfall when you put the top on. Although this does mean more plate licking later on.

Finally, yank the ganache out the fridge and smear it generously all over the top of the cake. I put some of mine in a piping bag and made some pretty patterns on top so feel free to do whatever you want. Then you may cut a slice and sit back, thinking of the good times you had making this delight of a cake.

Bon appetit,
A x


Thursday 3 March 2011

Mushy Mushy

Well Oli would like me to write about cooking with a different vegetable every day of the year... the ridiculousness of which has clearly not occurred to him. If anyone would like to compile a list of 365 vegetables, in seasonal order, the please do so and I will be happy to oblige!

Seeing as how the most important thing to any man is his stomach (as evidenced by the above request) I shall put a recipe on here today. Super simple baking that anyone can do. So yesterday I made a banana and chocolate loaf. It's bloody delicious! Ed and I are fighting not to eat the whole thing right now. The main benefit of making a loaf over a cake is that you get to spread butter on each slice if you want and you don't have to feel outrageous about it. This recipe is fanastic if you have any bananas that have been around a while and are going over to the dark side. Waste not want not!

So, ingredients:

Between 2 and 4 bananas, depending on how much you like banana
100g of chocolate of your favourite sort
130g of butter
170g caster sugar
340g self-raising flour
2 eggs
Tsp bicarb of soda
Tsp vanilla essence or flavouring

Turn fan oven on to 180 degrees, non fans probably need to be hotter, but who knows. Cream (AKA mix) the butter and sugar until you have a smooth fluffy yellowness, the mix in the eggs slowly (beat them beforehand for best results). Do not worry if this looks a bit gross and gooey. In a different bowl, mash the bananas then add the flour and bicarb (seived if you can be bothered). Add the floury banana to the buttery mess and shove in the vanilla. Mix well. Smash the chocolate up inside its wrapper with a rolling pin or handy mallet then chuck it all in the bowl. Mixey mixey. Butter up a load tin so the cake doesn't stick, pour the mixture in it and put it in the oven for about 45minutes. Stick a knife in the middle when you think it's ready, if it is then the knife will come out clean. Turn it out and leave to cool. Spread on butter. Eat in fit of ecstasy.

If this does not turn out great then I will eat my hat. I used 3 bananas because I like medium banana-ness btw.

Happy baking.

A x

Wednesday 2 March 2011

Ice Hockey Nice Hockey

Housemate Ed and I got ESPN America this week, finally, thank the Lord! Should have done it earlier as I've missed much of the Washington Capitals season but that's no one's fault but my own. HD has revolutionised the watching of this sport, making the puck actually visible and therefore the game more than just a blur of colours and punchups.

It occurred to me, whilst watching Buffalo beat the NY Rangers this morning, that we as field hockey players have a lot to learn from sports like ice hockey. Aside from the fights, there are several aspects of the game I wish were more prevalent in its land-based counterpart. Firstly, the linking play. It's incredible. The puck is constantly moved with an accuracy most sports teams could only dream about. There's no selfishness or "I could do this better on my own" mentality and this allows for a great passing game to take place in a relatively small and extremely crowded field of play.

Secondly, there's the speed of shot. You don't have time as a goaltender in hockey to not be in the right place because these guys can get a shot off from anywhere, at extreme speeds. And they do. There's no hesitation, it's a ruthless attitude that gets most of the goals. Taking the opportunity the second it occurs and not a moment later. Yes, this obviously comes with playing and training at a sport at a national level, but it's the speed of thought that is available to players at all levels. The ability to get the ball and simultaneously decide what must be done with it. This is something I can learn from as a keeper too. Save the ball and rebound it safely, at the same time.

Lastly, I think we as a team (Huddersfield Dragons Ladies 1s, hoorah) and many of the teams I watch play field hockey, lack the sense of urgency displayed in ice hockey. I remarked to Ed this morning that even in the last ten seconds of an ice hockey match, you're never sure it's over. It is frenetic. Yes this pace owes a lot to the fact that it's on ice, it's faster, but it's the urgency in the players I am talking about. The desperate quest for goals. The hard pushes that last only seconds but produce results. Occassionally, in a really tight field hockey match, the last few minutes will be filled with this energy, a full time short will get the pulse racing, but it would be great to see this goal passion throughout the game.

Lord knows how any of this would be achieved, it's all just musings and I don't pretend to have ideas about how or even if these things could surface in field hockey.

I just wish they would.

A x 

Your video treat today is a collection of ten bloody awesome ice hockey saves that anyone can appreciate: